Jul 29, 2014

Bead Along with Janice, Part 4


Color Study Part 4: Wheat
by Janice Parsons

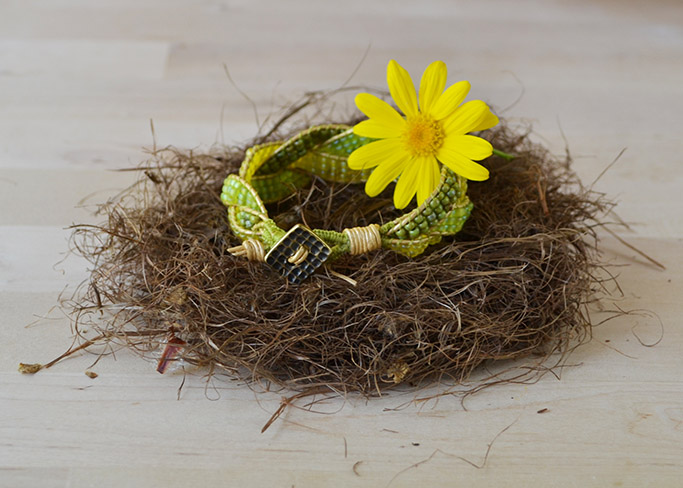
In Wheat, Part Four, Janice builds the last section of this 5 wrap bracelet project using just a few beads and 2 feet of chain.

The chain laddering is built on the same technique used in earlier sections of this project, but instead of doing it with beads, we are weaving through chain. The most notable change is the addition of flexible eye beading needles to help string the Tuff Cord through the chain links. Please refer to Parts One,Two and Three for techniques and materials used to complete the entire bracelet and watch the video by Brittany Ketcham, Stackable Ladder Bracelets for laddering and macramé techniques.


Time to Complete: 2 hours
Level: Intermediate

Ingredients for Part Four:
8/0 Picasso Canary Seed Beads*
3 yards Tuff Cord #1 in Teal or Green
8/0 Picasso Brown Seed Beads*
2 Feet of Wheat Chain in Old Brass cut in 
two lengths of 12 inches each
2 One Shot Picasso Beads

Studio Essentials:
Thread Zapper
GS Hypo Cement
Thread Snips
Wire Cutters
2 Beadalon Flexible Eye Needles


Before you begin, secure your project back to your design board.


Slide the pony bead away from the macramé. Cut a length of Tuff Cord 3 yards long. Find the mid-way point and position it under the the leather. Tie a square knot around the leather to secure it in place. Feed the tails through the pony bead.


Slide the pony bead back up into position and macramé about four complete square knots below it.


Using your new length of Tuff Cord to ladder, begin with one 8/0 seed bead in your first row. Your second row will have two beads. 


Cut your chain into two equal lengths of 12 inches. Refer to our guide on How to Cut Chain, if you are new at getting lengths even. If one chain ends up longer, you can cut the extra link or two off before you finish.

Thread each tail of Tuff Cord onto a Beadalon Flexible Eye needle, leaving about 3 inches of tail. The pointed loop of the needle’s eye will keep the Tuff Cord tail in place.
Thread one needle+Tuff Cord through the last link on each chain. Repeat with other needle+ Tuff Cord going through chain in opposite direction. This is just like laddering a bead; you come through it from both sides.


The first couple of passes are the most difficult. “Drawing” your chains into position between the two pieces of leather and getting the correct next links to ladder through can be challenging but it's doable!

Remember with each new ladder you have to go under and over the leather tails just as you would with beads.


Holding the chain up so you can see the next links can be helpful. Very important to remember: Do NOT over tighten your Tuff Cords. Keep it loose but steady. If you ladder chain too tightly, when you go to wrap it around to wear, the chain will kink or not bend.


As you come to the chain ends, if one piece of chain has extra links, use wire cutters to cuff off excess links. 

Add the two rows of seed beads (as you did at the beginning in Step 4) or go directly to ending with chain. Before making this decision, take your project off the board and test that it will wrap around your wrist five times. If not, you may need to add several rows of seed beads to achieve the length you need. Always check tension of your thread and chain to tighten or loosen so the chain will curve around your wrist.

In measuring, remember the button loop will add approximately 1 inch to the final length.


Once you have the chain resting with enough room to curve, tie a square knot with your Tuff Cord tails as you did in Step 2.  Add a bit of glue directly to your leather.


Continue to macramé Tuff Cord over the leather for several knots until you have about 8 knots.
Carefully singe off the excess Tuff Cord using your Thread Zapper or cut with wire cutters. Be careful, you don’t want to damage your leather or your macramé knots.


When you take your wrap bracelet off the board to measure the length and number of wraps, you will probably find there is a “front” and “back” to your chain section. Each side has its own personality and you can wear it either way.


Secure your project back on your design board.

Bring your button up through the leather to see how wide the loop needs to be. You can leave the button there while you macramé below it.

Cut a new length of Tuff Cord 1 yard long. Tie it in a square knot just below where the button ends. Repeat in Step 9 adding a bit of glue to the leather and macramé about 8 knots to make a button loop. Use your Thread Zapper or wire cutters to cut off the excess Tuff Cord.


Unsecure your project from the design board.

To add the artisan signature of beaded tails, cut your leather tails to about 3 inches in length each.

Add a pony bead to each tail and tie an overhand knot below it. The finished length of the tails should be about 1 inch. If you make them too long, they will get caught in things and get wet from water in the sink.

Tie an overhand knot below each bead. Before you tighten the knot, add just a drop of glue into the knot to keep it secure.

Use your wire cutters to cut off any excess leather. 
You are done! You did it!


Jul 11, 2014

Bead Along with Janice - Part Three


We could not be more excited to share Sun, Part Three of our Bead Along with Janice Series. By laddering 8/0 Seed and Tila beads using one of her favorite techniques - known as pebbling - Janice was able to create a color story that is beautiful, interesting and unstructured. This bracelet gets more amazing with each stitch!

In this post, you will find an ingredients list and instructions to help you complete the third wrap of this color study exercise. Remember that you can also view free video tutorials and handouts at www.beadshop.com. Of course, please do feel free to give us a call or send an email if you have any questions - we are always happy to help. We truly hope you will share your creations with us when you finish Part Three.


Be sure to check back soon for Part Four of our Bead Along series. Thank you for reading, and happy beading!

Jun 26, 2014

Bead Along with Janice - Part Two

Here at beadshop.com, we love working on any project that allows us to use multiple stitches! After all, it helps us to both hone our skills and create a truly unique piece of jewelry. You can imagine how excited we all were to see that Janice did just that in Part Two of the Bead Along series. By using the macrame stitch to create the second wrap, she has taken this project to an exciting new level. We certainly hope you'll love it as much as we all do!

In this post, you will find an ingredients list and instructions to help you complete the second portion of this color study exercise. Remember that you can also view free video tutorials and handouts on our website. Also, please feel free to give us a call or send an email if you have any questions - we are always happy to help!


Great! Now that you've finished the second part of your bracelet, how about sharing it with us? We would love to see your progress! 

Of course, please don't forget to check back next week for Part Three of Bead Along with Janice! Thanks for reading, and happy beading! 

Jun 19, 2014

Bead Along with Janice - Part One


We absolutely love getting new product. In fact, inspiration often strikes immediately upon opening the boxes. This was certainly the case with our newest Czech glass two hole beads!

Janice, our founder and leader, loved these beads so much that she promptly set to work on a new bracelet. Then, she decided it would be fun to share the entire creative process with you! In her own words, “With the addition of the new Chexx beads, I felt really inspired to make a new bracelet. I’m not sure what I’ll do next week, but I love green, so that’s my Part One.”

We hope that you will join Janice in making a four (or maybe five!) wrap bracelet. Each week she will add a new section with new colors and other techniques. The project map with images, detailed instructions and a personal note from Janice is shown below. Please remember that you can also print handouts and view tutorial videos on our website at no charge. 

This week is macramé and laddering with Picasso Green Beads…


Wow! You should be well on your way to creating a beautiful new addition to your jewelry wardrobe. Please be sure to check back next week for Part Two of Bead Along with Janice. Happy beading!


May 24, 2014

"Playa" Bracelet Instructions & Sneak Preview of our upcoming Summer Series!


It's Summertime... and these projects are breezy!...

We've been busy little bees at Beadshop.com these past few weeks creating what Janice calls, "Sun Jewelry." 
What is Sun Jewelry? 
"...that bracelet or necklace worn all summer…in the water, at the beach, wherever! By summer’s end the leather will be all worn and old from too much water, too much sand, too much fun…but, it will be the best (piece) that never left your side…holding secrets and wonderful memories…”
It all started with the "Tahoe Bracelet" that Janice created last Summer. The idea of grabbing some leather, a clasp, a few treasured beads and fashioning a bracelet that would be your best friend throughout the Summer, distressed by exposure to the elements and rich with fun-filled memories by season's end inspired a movement. 

To celebrate, we've decided to bring you a sneak peek at what's to come! Below, you will find instructions to "Playa," a tribal laddered cuff that showcases our limited, but extremely fitting, Sand Cast Tribal beads. 
Since these beads were made in the 1950's, we cannot guarantee that they can be reordered again. However, this style of bracelet can be made using any barrel style bead that you treasure, as long as the holes are large enough to accommodate two passings of your Fine Weight C Lon. Please refer to our Tribal and Trade beads for more inspiration and ideas. Don't forget, you can certainly refer to our "Stackable Ladder Bracelet" Youtube video for detailed instructions on the laddering process. Free downloadable instructions can also be found by clicking here


Ingredients & Studio Essentials


 Let's Begin! 

First, you will need to successfully strap your project up to your design tray. We recommend reviewing our previous post on "how to set up a design board." 
Step 1 begins after the project is strapped up and ready to go...

* A Note on Measurements: The amount of material (beads, thread & leather cord) you will need for this project will vary depending on wrist size. Please measure your wrist, and use the following as a guideline: 
Length of 1.5mm leather cord: Wrist measurement x 2 plus an extra 6 inches. 
Length of 1.0mm leather cord: Cut 2 pieces, 12 inches in length for Silk Wraps. 
Length of C-Lon: 2-3 Yards for a single wrap bracelet (you will have extra left over)
Barrel Beads: 30+ (or less, depending on how long you want your bracelet to be)


Congratulations!

You have just completed the first of our fun Summer projects we created to honor the season. Make multiple versions using various colorful beads. Make one for your mom, dad, brother, boyfriend, girlfriend, best friend, or even your pet!

From all of us at Beadshop.com, we wish you a very happy, fun and creative Summer! Stay tuned for our upcoming full length video release of our "Summer Series."  


May 16, 2014

Project Update: Compadres and New Staff Member!

Some of you may have seen her signing your orders already, but we are so excited to give everyone an official introduction to our newest team member Savanna! You can get to know her by reading her biography on our About page.
The first thing everyone does when they arrive at beadshop.com is sit down and make one of our projects. Savanna, our new Inventory and Fulfillment Assistant, arrived at the company right when we launched our Compadres project and she just had to try it out. Her sample is named April, and you can find the ingredients for it here.
Clockwise from upper left: Sam, Savanna, Brittany and her puppy Clover, Karen, Janice, and Beckie
We are so thrilled about our new team member, and can not wait to see what other beautiful things she will create. Welcome Savanna!


Flash Sale Friday...get creative!

Last week Kate went shopping for some special strands at a local gem show, and she brought back six stone strands she couldn't live with...