


 |
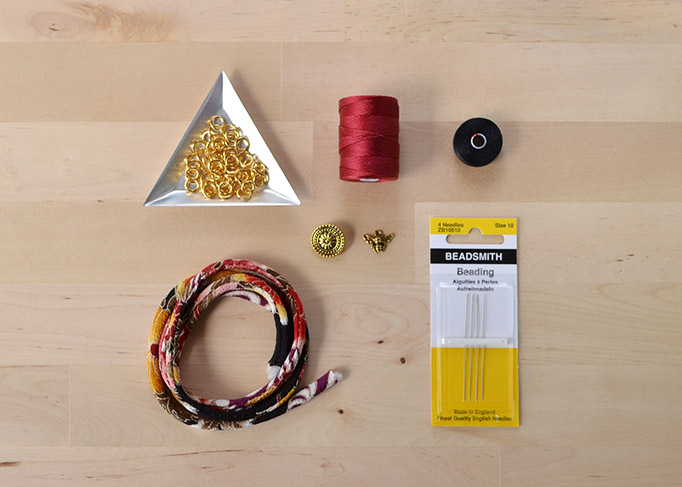
| Ingredients pictured above: Mums on Black Kimono Cord, Brass Plated 7mm Jump Rings, Red C-lon, Black Superlon D, Bali Button in Gold, Mr. Bumble Charm in Gold |
-1yard of 8-9mm Kimono Cord
-1 package of 7mm Jump Rings
-1 spool of C-lon for silk wrapping
-1 spool of Superlon D matching your Kimono Cord (note: we used a contrasting color in the tutorial)
-1 Button with a shank
-1 Charm
-Size 10 Beading Needles
Tools Not Pictured Above:
-Chain Nose Pliers
-Bent Chain Nose Pliers
-GS Hypo Cement
-Thread Zap II
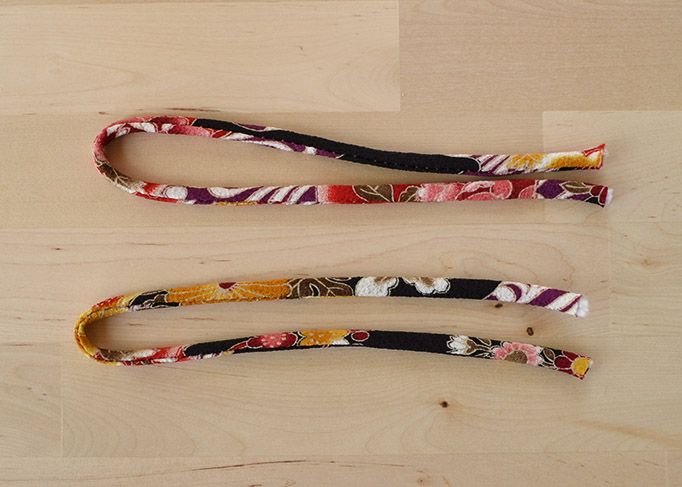
(Diameter of your wrist + 1.5 inches) x 2 = Total length of Kimono Cord
For example, my wrist is 7 inches in diameter. I add 1.5 inches to this and get 8.5 inches. Because the cord is going to be folded in half for this project, I then multiply this number by two and end up with 16 inches total. One thing to note is that Kimono Cord can vary greatly in pattern and color. The two lengths above were cut from the same yard of Kimono cord and they look very different. Once you have your cord cut, you are ready to get started.


Love this. I so want to try it. Thank you for sharing! :)
ReplyDeleteHi there! I'm so glad you love the bracelet. Let us know how it turns out if you try it. We would love to see!! : ]
DeleteThis is a gorgeous new bracelet pattern! I can thank beadshop.com for introducing me to this lovely cord. I'm so glad you've continued to carry it and in such beautiful colors. This project reminds me that I need to order more! I can't wait to create some of these bracelets :)
ReplyDeleteThank you Lois! It really is such a wonderful cord isn't it? I had no idea such a lovely thing existed before coming to beadshop.com either, but I'm certainly glad I found it! If you do make some of these bracelets, I hope you have lots of fun with it! : ]
DeleteOh this is gorgeous! I can't wait to try this beautiful bracelet! jean
ReplyDeleteWhen measuring your wrist, do you mean the circumference?
ReplyDeleteYes. I apologize for the confusion, you want to measure around your wrist to find out the total circumference.
Delete